If you have a spirit for adventure, it’s no doubt that the infamous “Stairway to Heaven” hike in Oahu has already seen its place on your bucket list. I am sure you have heard the stories of hikers running from the guards and seen many an IG photo of the incredible sunrises and breathtaking views from the peak of the steps. Despite the fact that the stairway has been illegal to climb for the past 31 years, these stunning photographs are enough to make even the most law-abiding citizen think twice about not breaking the rules.
Fortunately, there IS a legal way to get to the Stairway to Heaven. The Moanalua Ridgeline Trail leads directly to the peak of the stairway, is equally as beautiful of a hike, and offers plenty of thrills of its own. It is a longer and more challenging hike requiring some climbing with assistance of ropes through narrow, muddy, windswept trails. Mistakes up here can be deadly, but with the right information and precautions, you can finally cross off standing at the top of the Stairway from your hike-it list (legally and mostly worry-free).
Background
The “Stairway to Heaven,” formally known as the Haiku Stairs, is an old staircase that was installed by the United States Navy for use to access the Haiku Radio Station. The station was built on top of the Ko-olau Mountain Range in order to transmit clear, uninterrupted signals to Naval Ships nearby. The wooden staircase was later replaced with metal railings and steps, but the station and trail was closed permanently to the public in 1987 due to safety concerns.
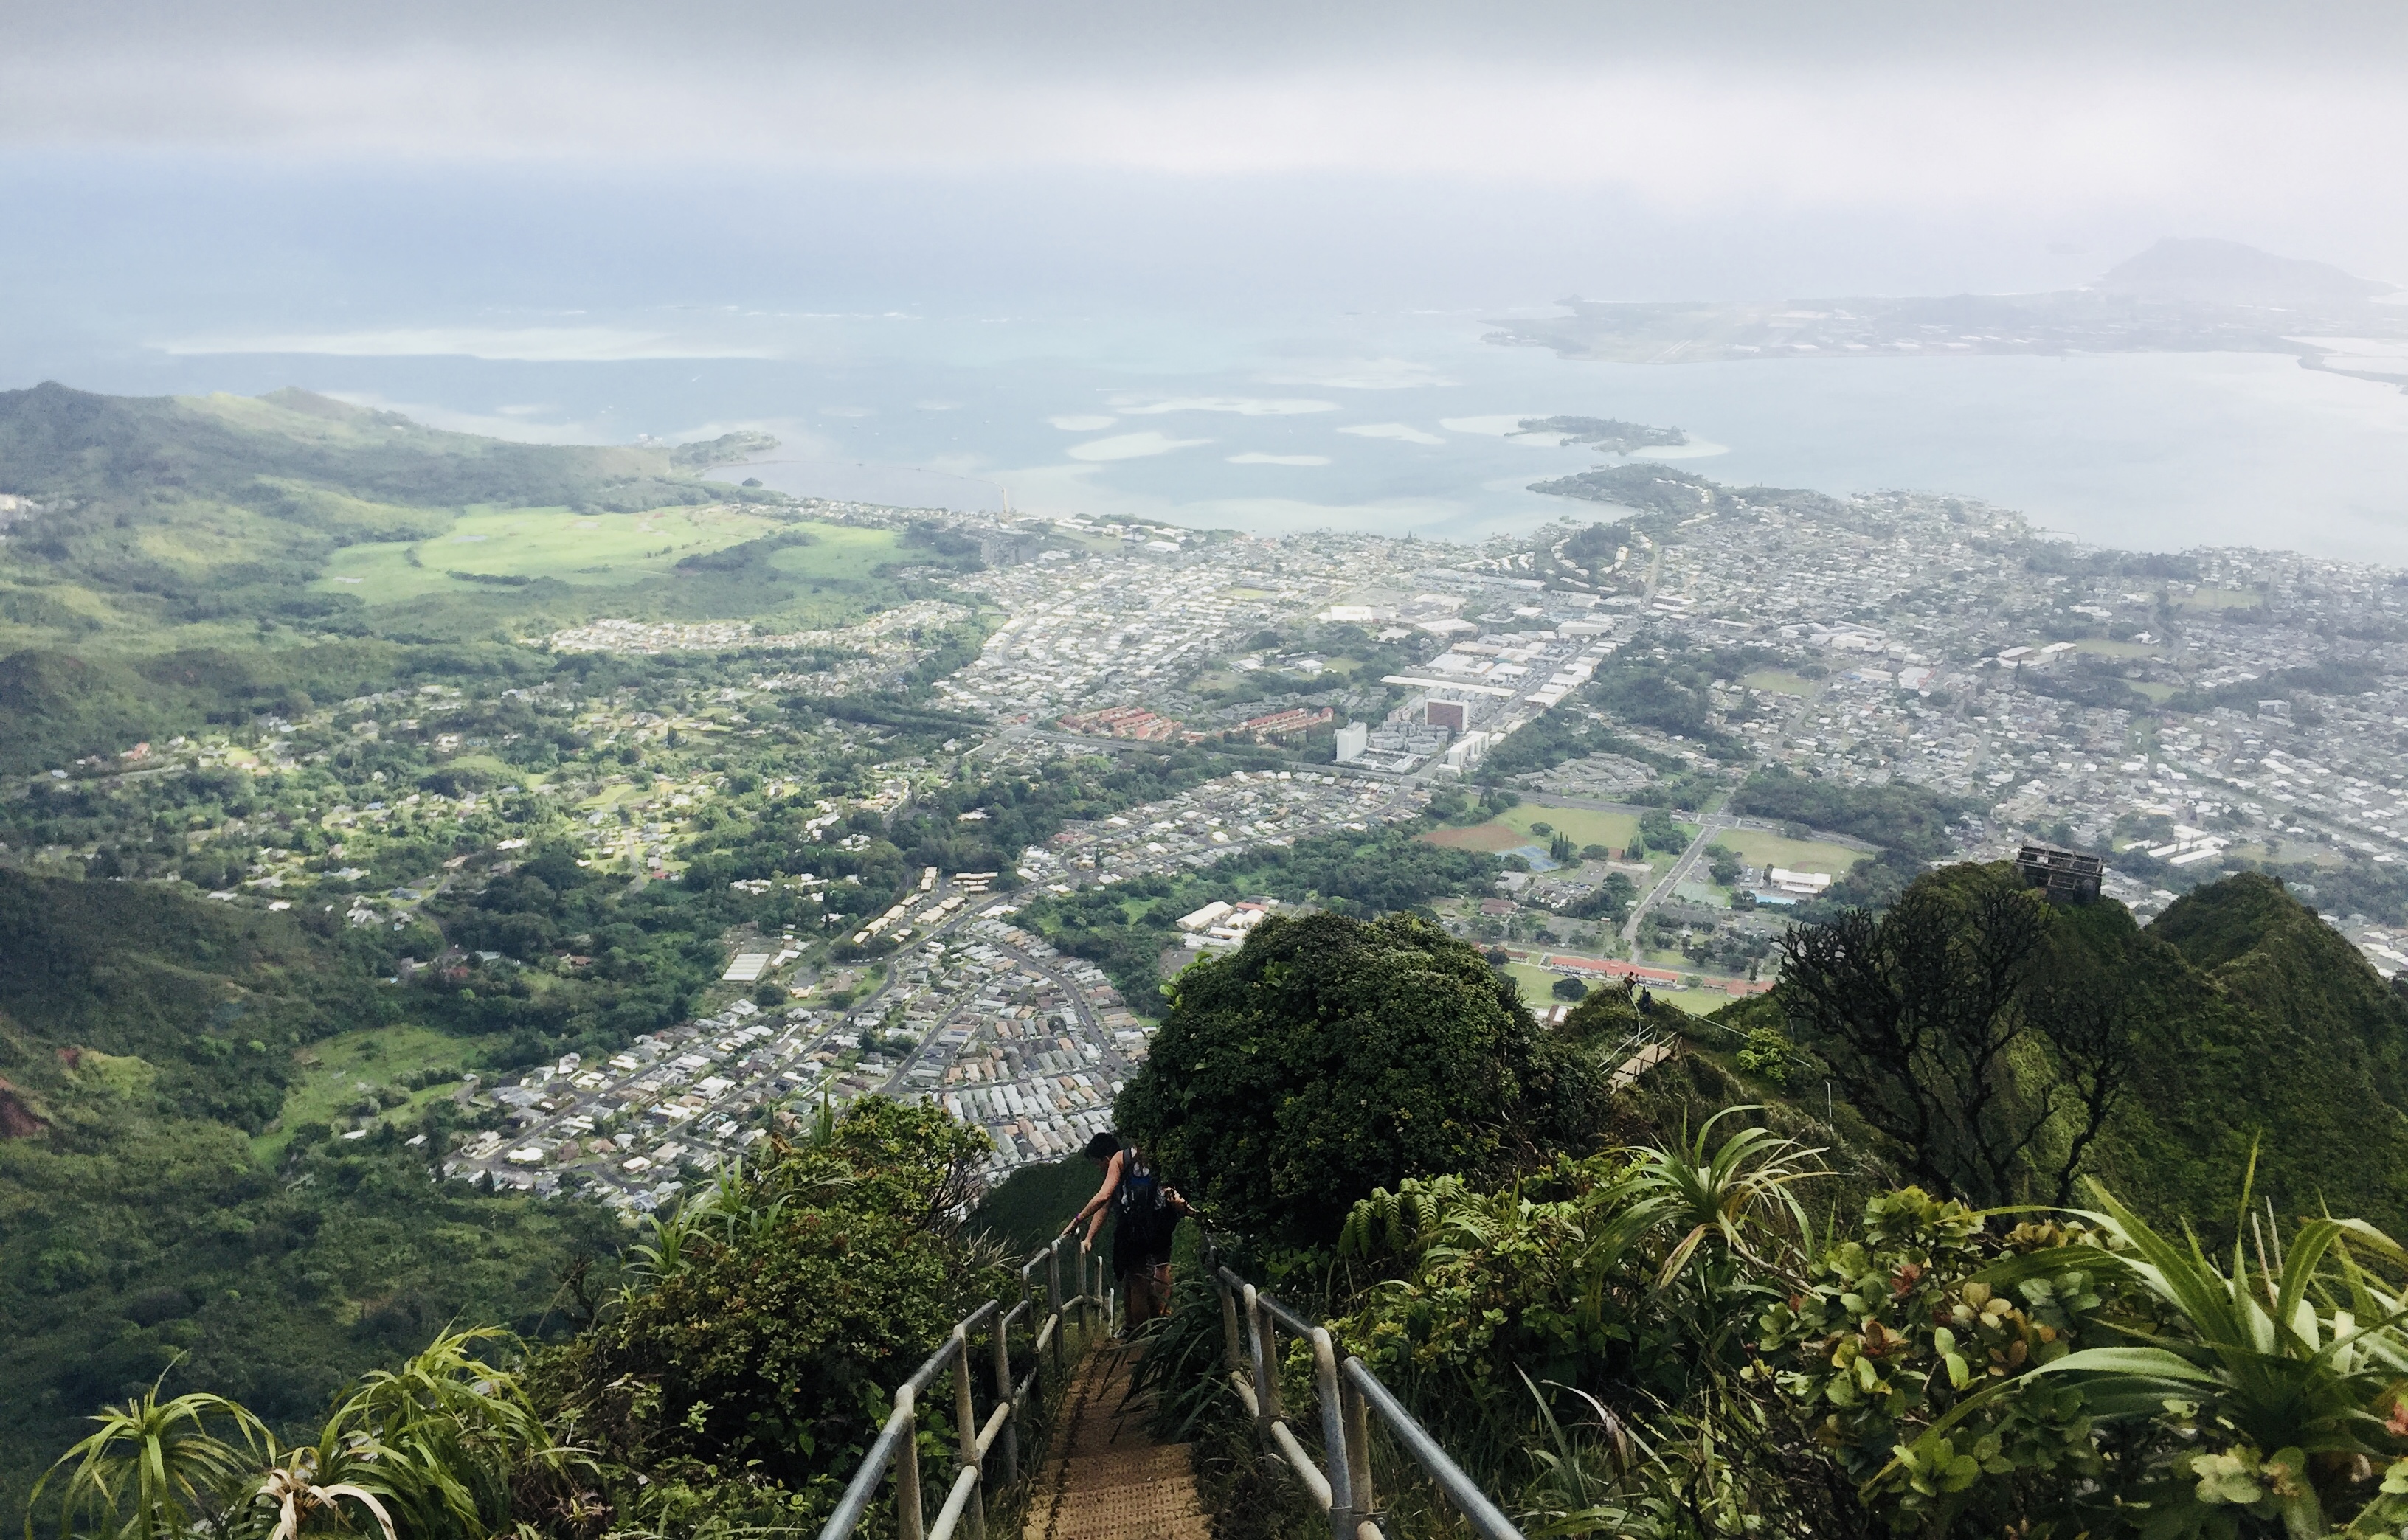
The city of Honolulu attempted to fix and re-open the stairway by 2002. Unfortunately, resident complaints, continued safety concerns, and several storms that damaged the new metal construction thwarted any efforts to do so. Today, the 3,922 steps are often approached by adventurous hikers and locals alike, despite the threat of hefty fines and lasting legal impact.
Currently, the charge for being caught attempting the stairway climb from the entrance is second-degree criminal trespassing. Repercussions include but are not limited to:
- Potential $1,000 fine
- Several dates sometimes months apart at the Kaneohe Courthouse requiring out of pocket costs for return travel and accommodations
- Legal fees for attorney protection
- Community service
- Potential marks on your criminal record
- Potential negative impact on your professional life (if you hold a government job you may even be let go)

Hike Overview
Distance: 10 miles out and back (add additional distance for exploring the stairway)
Time: 8 hours (cushion extra time for photography and nourishment breaks)
Elevation Gain: 3,051 ft.
The Moanalua Ridge
I recently had the opportunity to visit Oahu with some friends and decided I simply couldn’t leave the island without summiting the Haiku Stairs myself. After a lot of research and speaking with various locals with experience on the hike itself, I decided to forgo attempting the stairway hike from the base. The idea of losing my job or spending thousands of dollars to climb a staircase just didn’t seem worth it to me when there was an alternate route available.
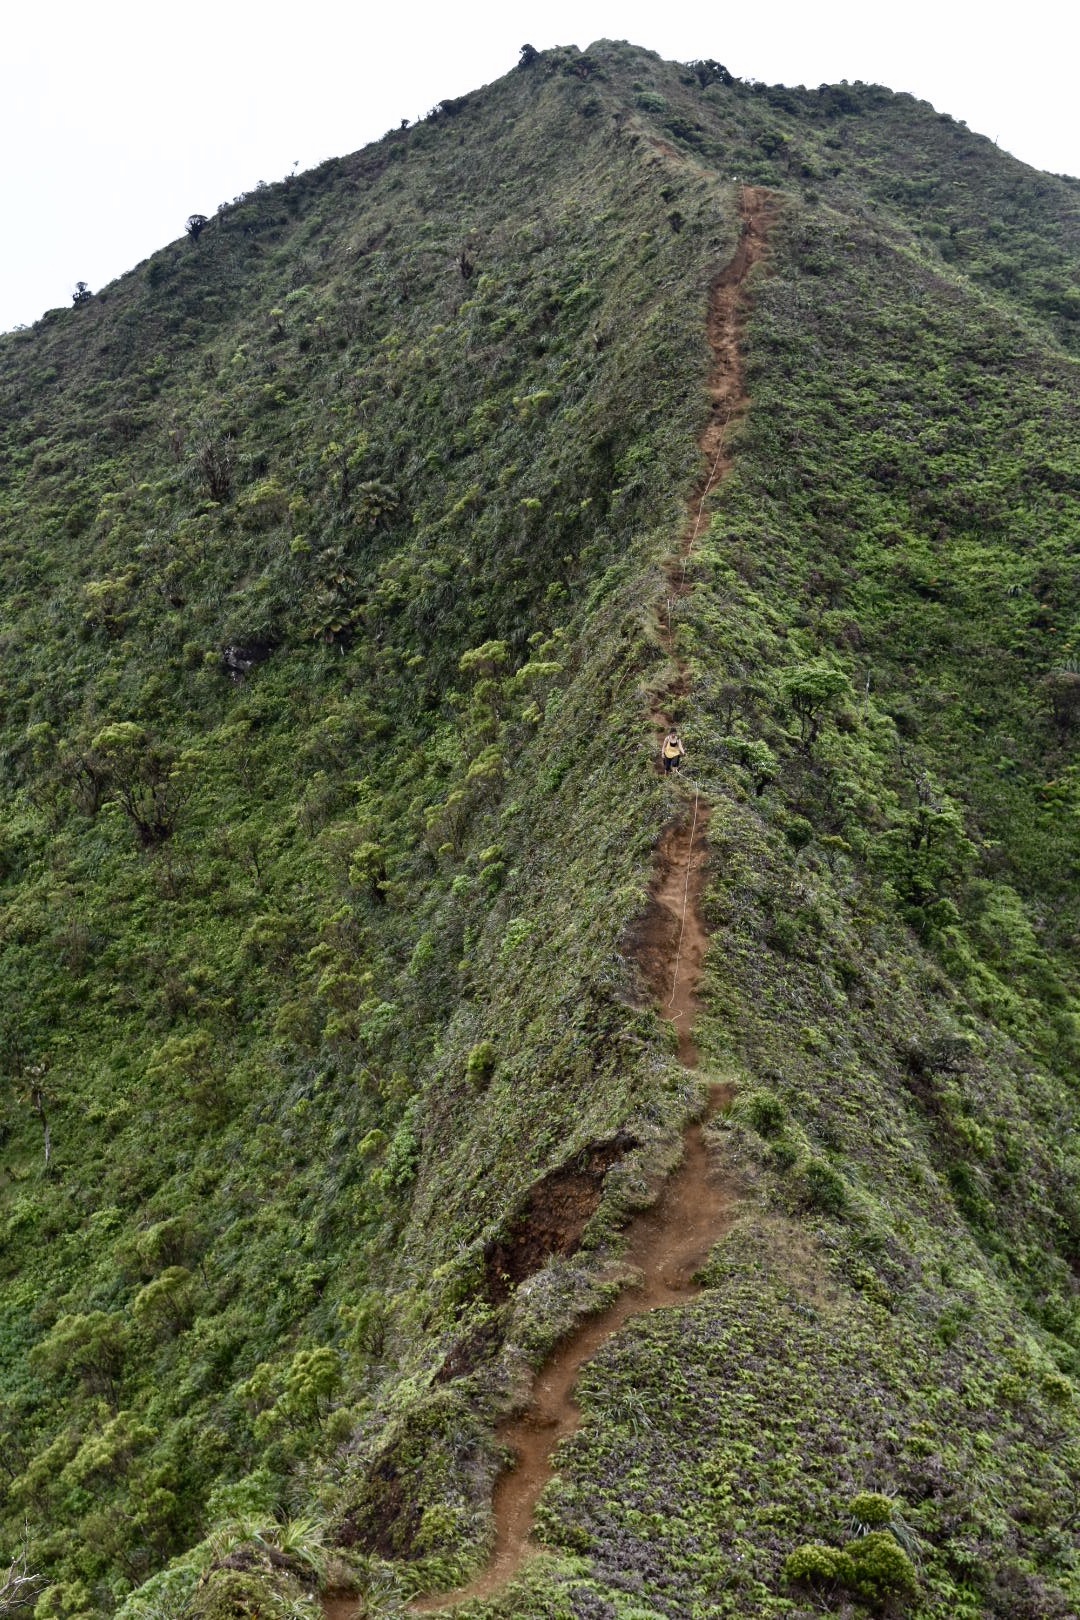
During my research, I stumbled upon the Moanalua Ridgeline Trail, a 10 mile out-and-back ridgeline trail leading directly to the summit of the Haiku Stairs. This is essentially the “back” entrance to the stairs. It is legal and in my opinion, the best way to be respectful to the island and its residents. It is equally unlawful to climb onto the stairs from here, but word has it that the guard and officers never go higher than the front base of the steps. This leaves you free to go up and down and take as many breathtaking photos that you want once you reach the summit.
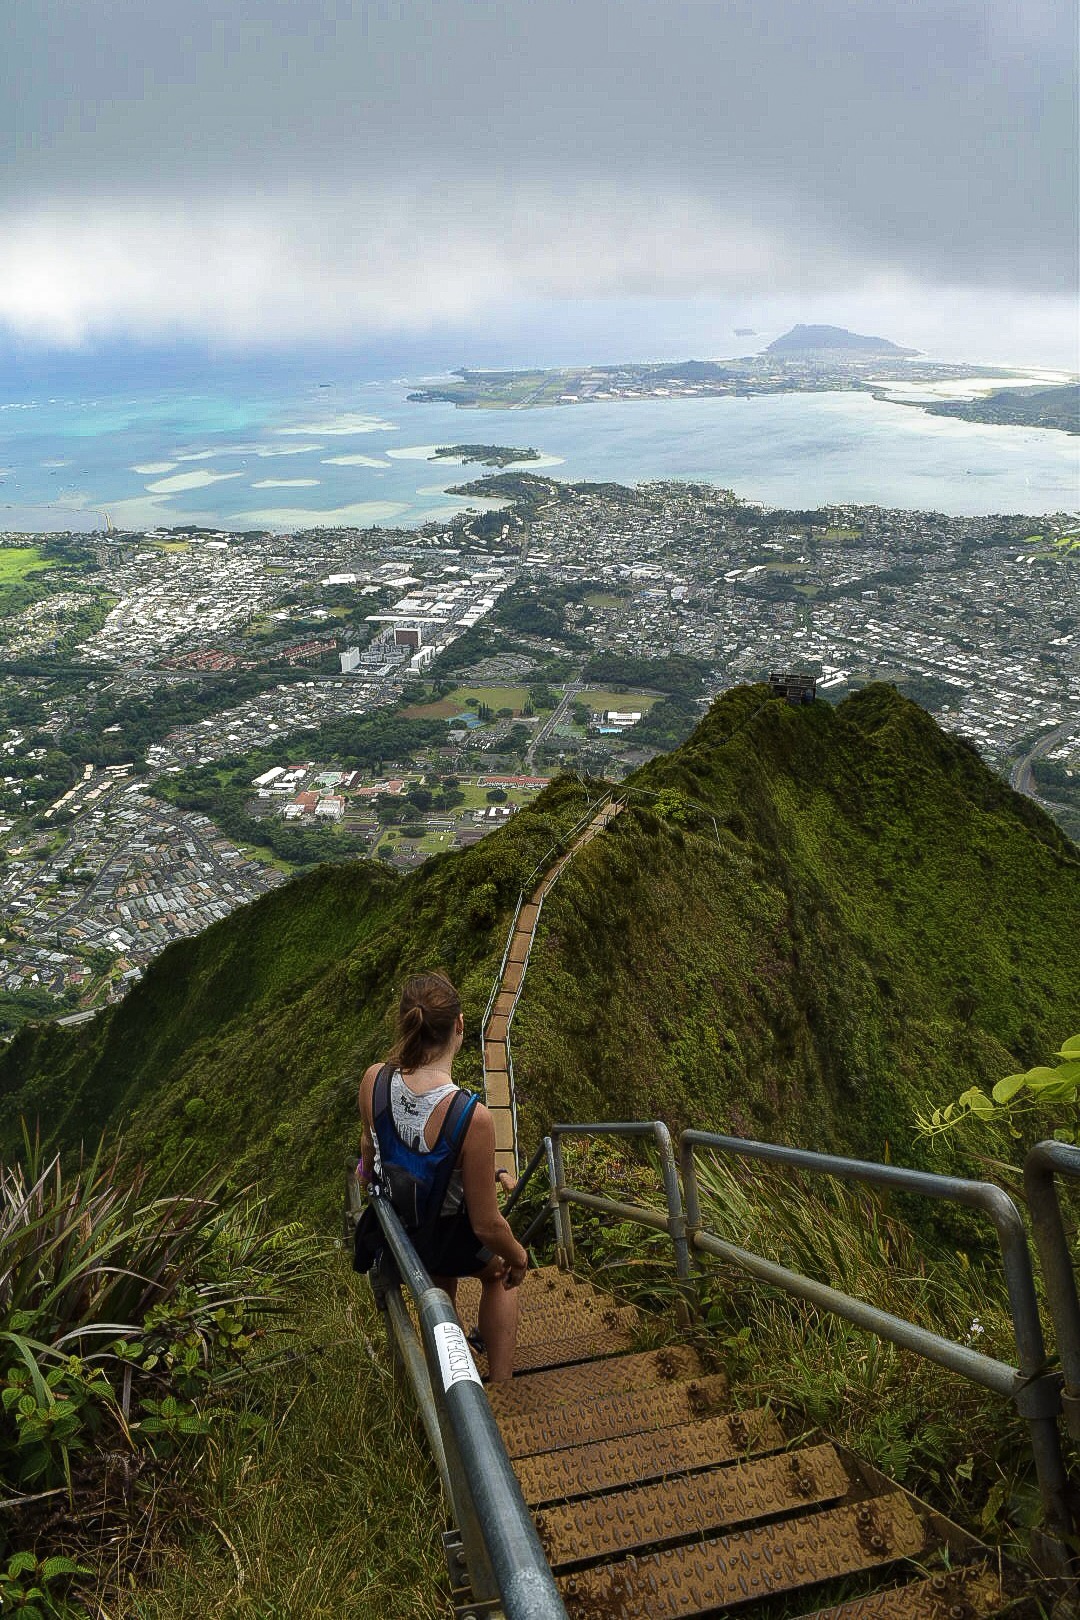
NOTE: If you want to hike up the stairway from the front entrance, know the risks and be prepared. There are several blogs that have posted various ways to cut through the drainage pipes or forest areas to attempt avoiding the guard. Be wary of this endeavor. They now have special duty officers as well as guard dogs patrolling the area that are perfectly capable of stopping you in your tracks on illegal ground. Though the security guard cannot ticket you, they can and will notify authorities who will oftentimes be waiting at the base of the stairs for your return. Should you decide to risk it, good luck. May the odds be ever in your favor.
Though the Moanalua route is becoming an increasingly popular alternative, the hike itself is still very dangerous (if not more so) and should not be attempted without proper hiking gear and trail knowledge. If you feel you are up to the challenge, read on for my full guide to hiking the Moanalua Ridge. You can also find more information and helpful reviews as well as hire local guides from All-Trails.
Hiking Tips
Start Early:
This hike is about ten miles round trip, not including the extra mile or so (depending on how far you want to go down and back up the staircase itself). The hike itself took us around eight hours total to complete. We did take our time going up, spent time digging out a friend’s Nike shoes from sink mud (she had to turn back), and battled some weather. We also spent time going up and down the stairs, taking photos, and eating lunch at the summit with some new friends. I recommend leaving before sunrise in order to get a head start and avoid the mid-day sun.
Dress Appropriately:
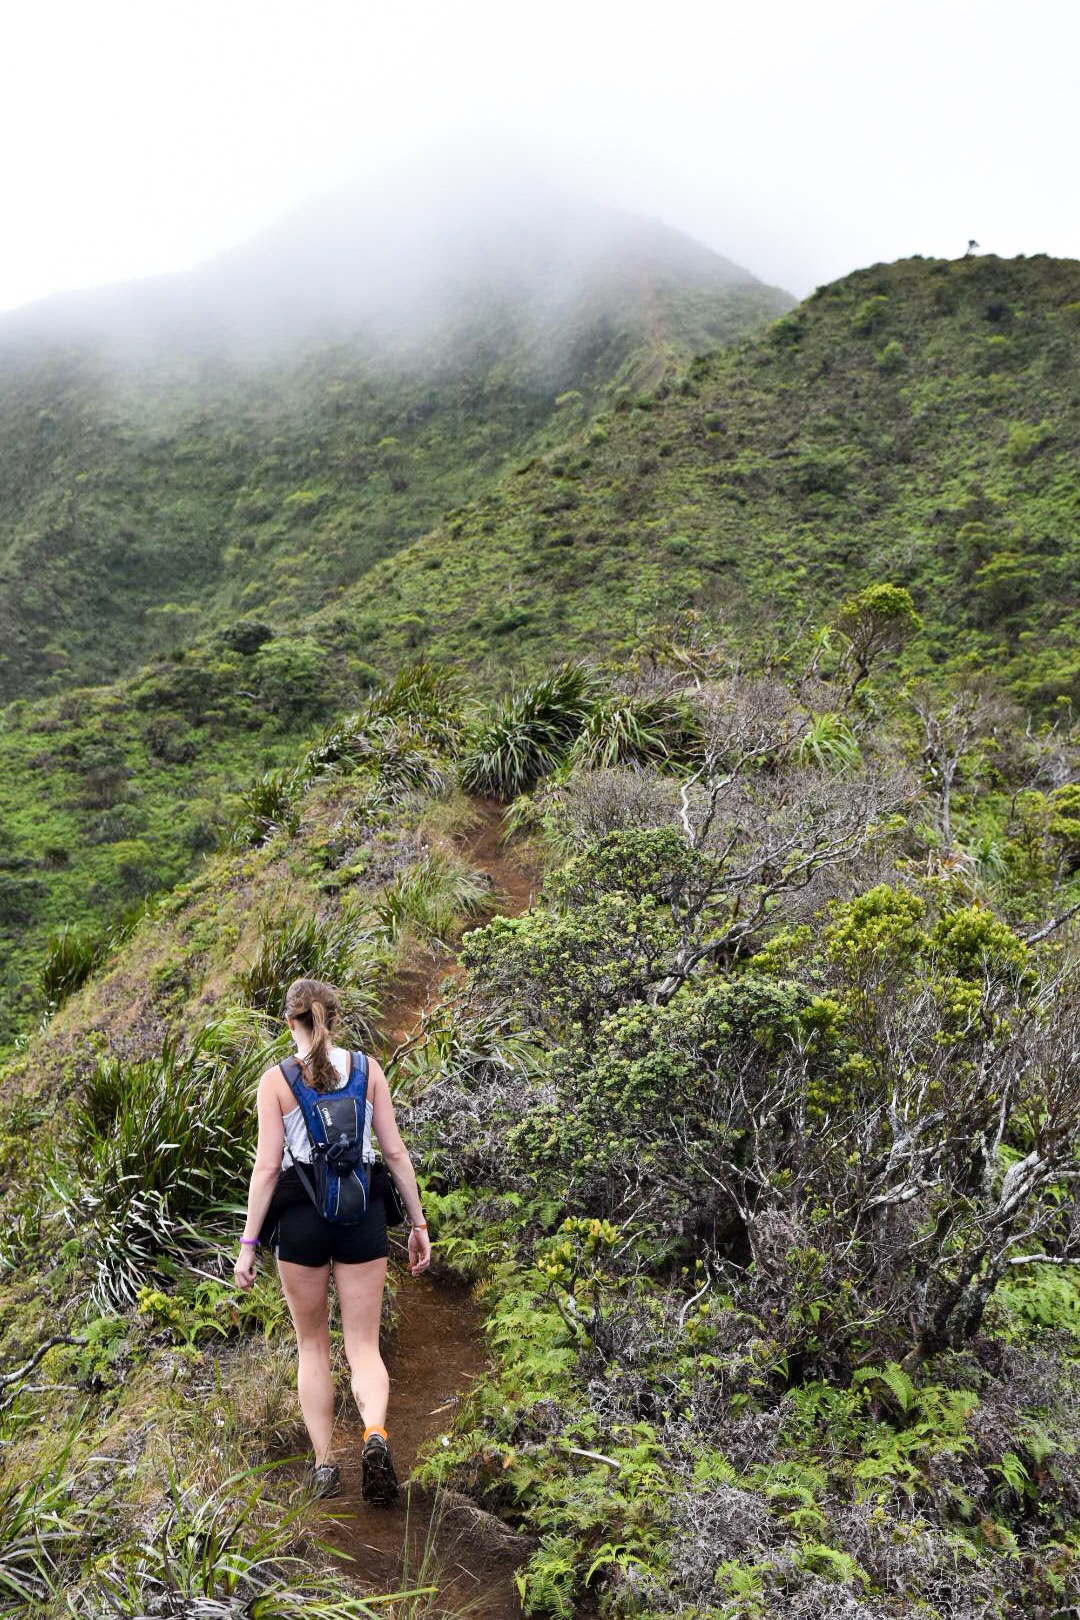
Conditions on top of the ridgelines can change in seconds without warning. Having the appropriate clothing, footwear, and gear will play a big factor in making it to the top safely and efficiently. Sadly, people have not made it back from this hike so make sure you come prepared and educated about the dangers!
For footwear I strongly recommend trail runners with good traction. The mud can imitate quicksand and is over ankle deep at points where the riverbed runs through the flat trail (before the ridgeline). We went with a friend who wore flat-bottomed Nike’s and lost both of her shoes in the muddy riverbank within the first 2 miles of the trail. We had to dig her shoes up with sticks just to get them out and narrowly avoided getting stuck ourselves. She ended up having to turn back with mud-soaked shoes in the pitch black for over an hour-long hike back to the car.
I also strongly recommend bringing micro spikes which you can easily find on Amazon or at an outdoor store like REI. These are spikes that strap onto your shoes and are most commonly used for ice hikes but are also great for added traction on muddy and slippery surface hikes! In addition, I highly encourage you to bring gloves with a grip surface like these as the metal railings on the stairs and the ropes on the ridge can become wet and slippery from morning dew or rainfall (gardening gloves work great for this purpose). This can also help protect your hands from rope burn should you slip while scrambling up or down the ridge line.

Equipped with water, snacks, layers, gym shoes, gloves, and shoe spikes!
I also recommend bringing a lightweight waterproof windbreaker with a hood. The Marmot Waterproof Rain Jacket is my absolute favorite for this as it has kept my camera and body completely dry during severe downpours on hikes. It is super lightweight and has ventilation zippers to keep you cool. If it does start to rain even for a few minutes this will be a lifesaver.
Even though Hawaii is usually warm, the wind can make things much colder. You don’t want to be shivering while trying to maintain steady footing, believe me. If you have electronics I also recommend making sure they are in a waterproof/dirt-proof case. The last thing you want is to be caught in the rain with your expensive camera and no way to protect it from irreparable damage.
You can wear hiking shorts or pants for this trail and a sweat-wicking shirt. If you go when it is warm out I do recommend shorts, just be wary of shrubs or tree branches that may stick out and potentially scrape your legs.
Exercise Extreme Caution:
This trail should only be attempted if you are prepared, in shape, and the weather is favorable. DO NOT attempt this if it is raining. You are a few thousand feet up at points with a straight drop on either side of the ridge and the trail is already really rough to navigate with the mud. Any additional precipitation can make this hike very dangerous and potentially fatal.
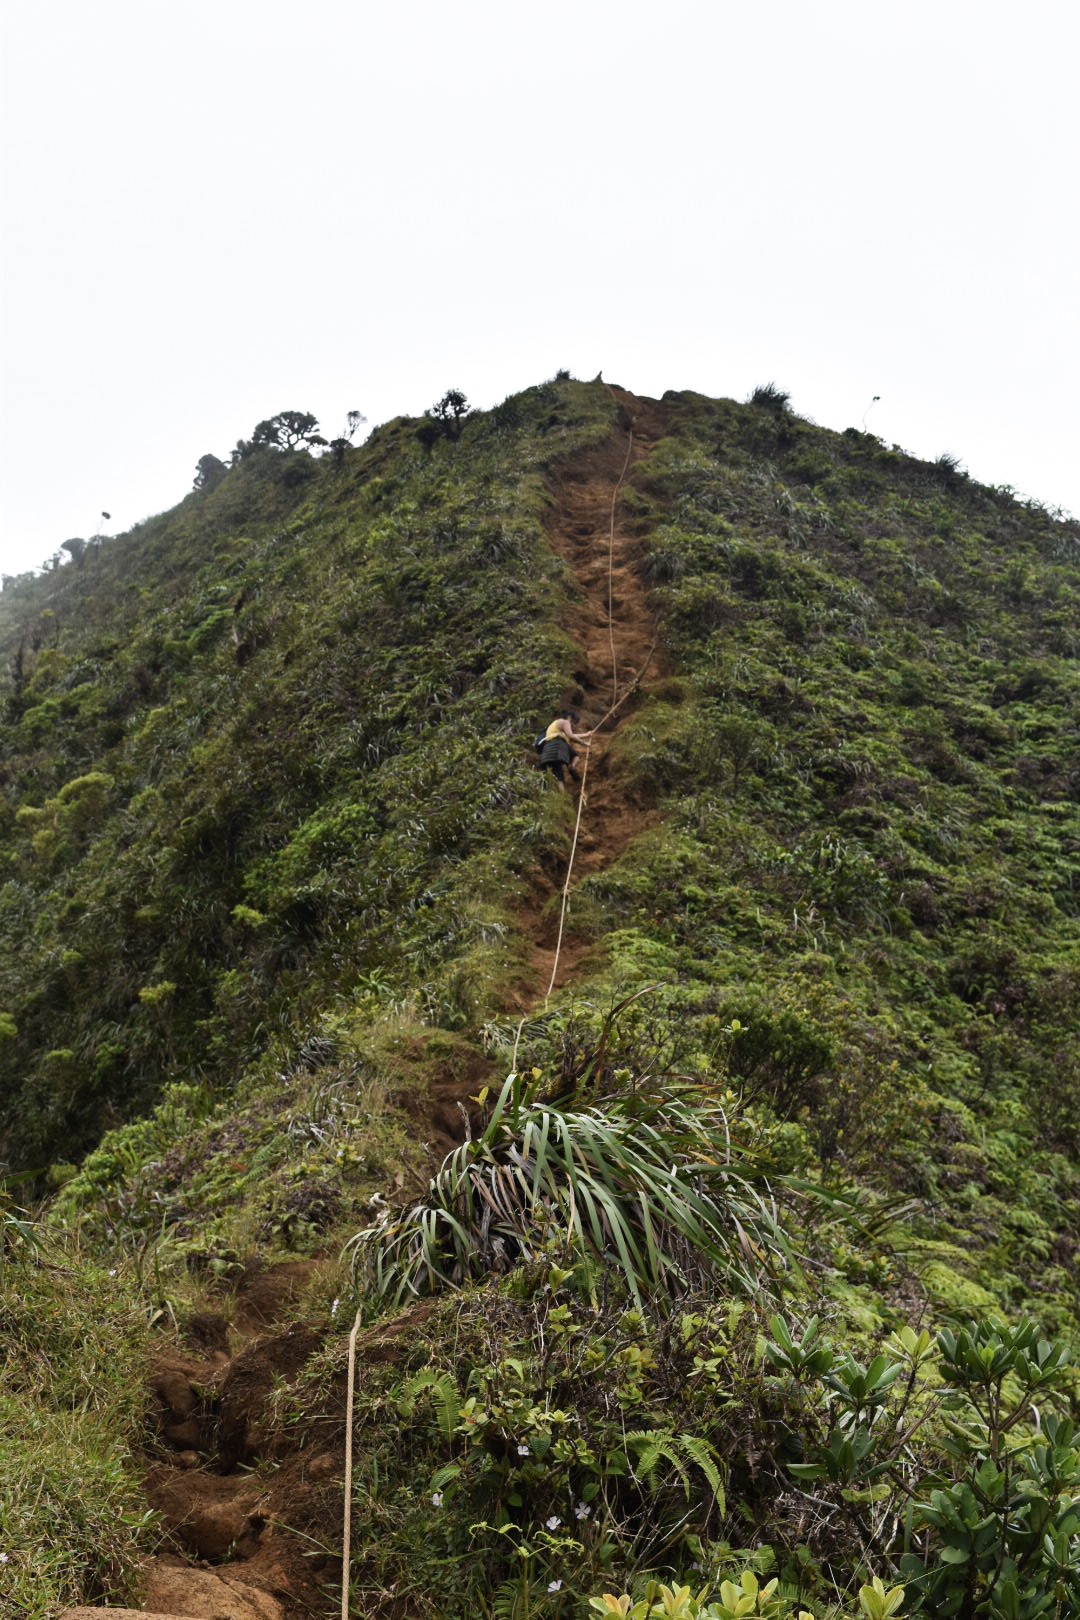
Proceed slowly and with caution! Trails can be muddy, wet, and slippery.
The ridgeline itself is comprised of a thin dirt trail that can get as narrow as a foot wide in some places. Make sure you really test your footing if the ground looks unstable, as there are some small but notable landslides off the sides of some of the areas. The wind up here can also be very sporadic. Exercise caution and bunker down against the ground if strong winds are present to avoid losing your footing. Just be patient, it will pass! The weather up here frequently changes within minutes.
Be careful before relying on any ropes along the trails, as they may not be completely secure. Some of these ropes have been up here for a long time and are barely attached in places. Use them as a guide but don’t fully trust them! Don’t rely on trees along the ridgeline for stability either. Many of the plants and trees along the ridge are not properly rooted and can give way under too much weight.
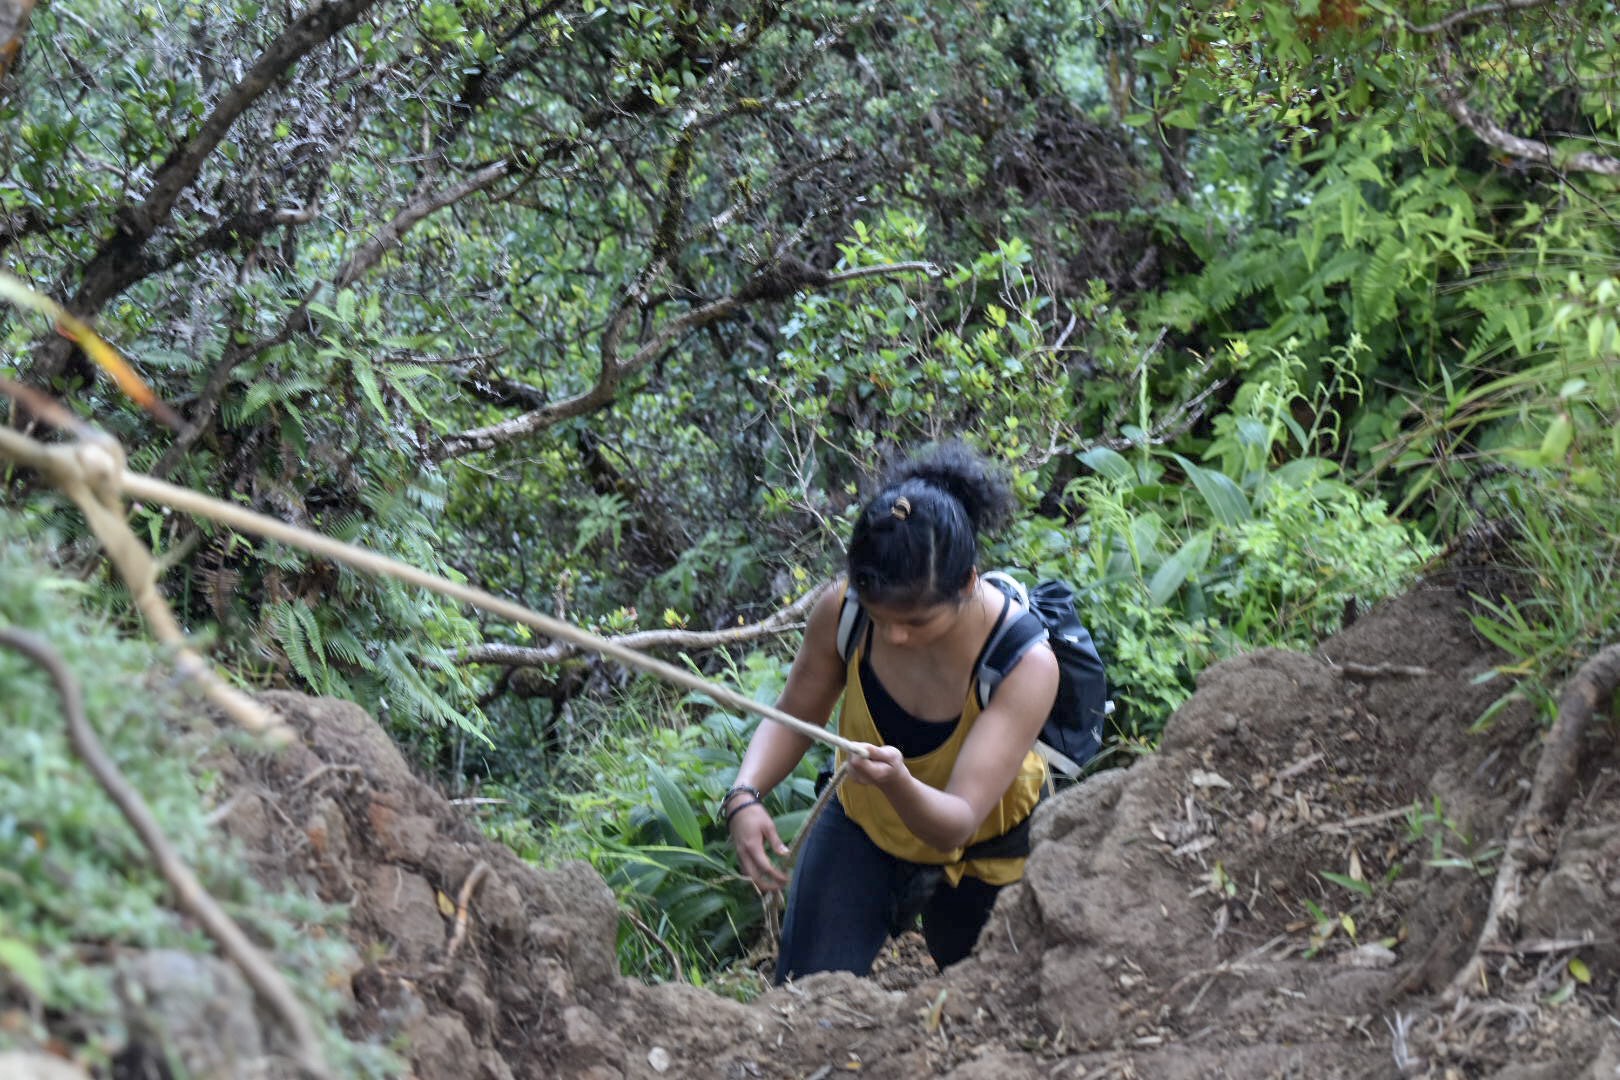
Kara slowly making her way up the rope scrambles
Note: none of this information is meant to scare you out of attempting this hike! It is just to warn you so you can be prepared before hiking and avoid accidents. This hike can easily be done if you take your time and just be careful. Having the proper shoes with spikes also really helps you maintain steady footing!
Finding the Trail
The Moanalua Ridge hike begins at the Moanalua Valley Neighborhood Park, located at 1857 Ala Aolani Street, Honolulu, HI 96819. If you drive up to the park you will see a set of gates and a small parking lot. If you start this hike before 8am, the gates will be closed. Parking is available on the side of the street just outside of them. They do close at 7pm so make sure you are planning to get back before then if you do choose to park inside of the gates.
Once you have everything ready to go, head to the right of the gate at the end of the parking lot where you will find the start of the gravel trail. This is the trail you will take to get to the base of the middle ridgeline. The first 2.5 miles of trail is relatively flat with rocks as you follow a stream over a series of 16 small bridges to the start of the ridge. Bring headlights to help guide your pathway through if you leave before sunrise so you can have your hands free.

Once you have hiked past the bridges you will come up on a sign on your left that reads Kulana’ahane Trail. DO NOT TAKE THIS! Several signs carved into trees instruct you to continue about 20 more feet up the path. Look out to your left and you should see a small opening with a giant boulder in a stream. That is the path you will want to follow. You will also see a curved tree branch over the pathway that has “Middle Ridge” carved into it overhead. This will be tricky in the dark so do your best to follow these instructions else you may spend a lot of your morning traipsing around the jungle aimlessly. I found this couple’s blog to be extremely helpful with navigating based on photographs! I recommend checking out their post and saving screen-shots of some of the instructions to help you along your way.
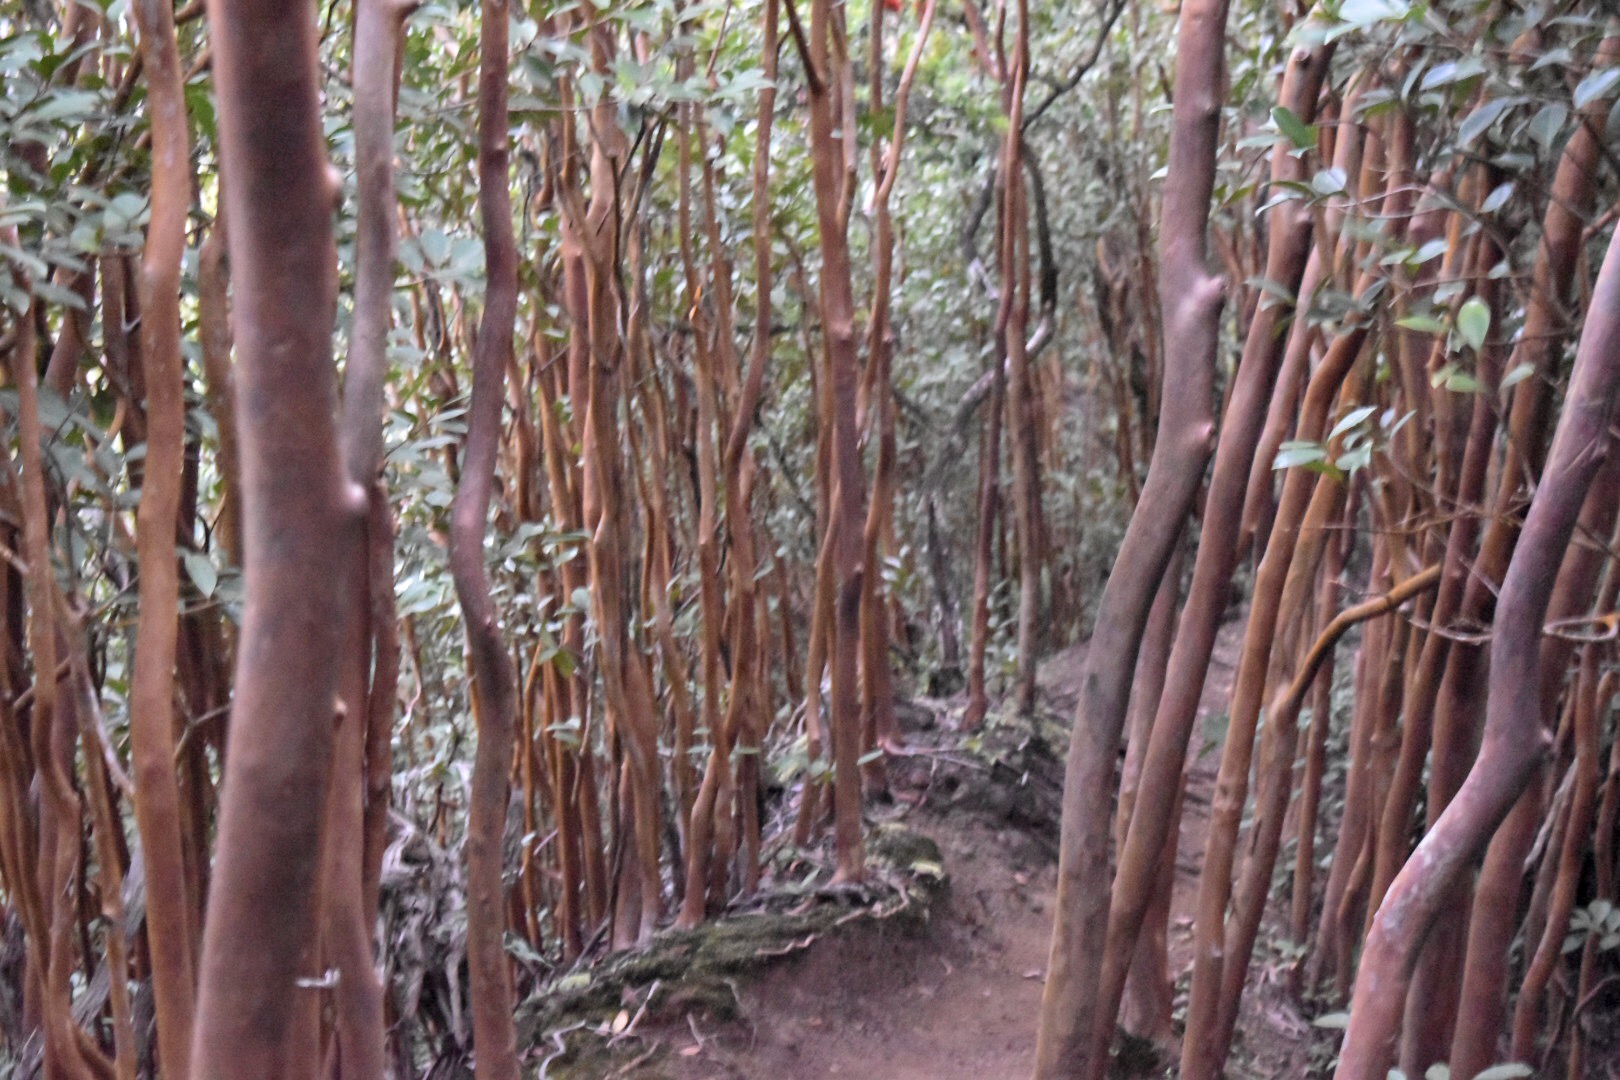
You will be in a wooded forest-like area for a little before hitting a section of long reed-like trees that almost look like bamboo poles. When you see this area you know you are on the ridgeline and can continue on the rest of the way to the top as there is only one path up on this ridge.
Hiking the Trail
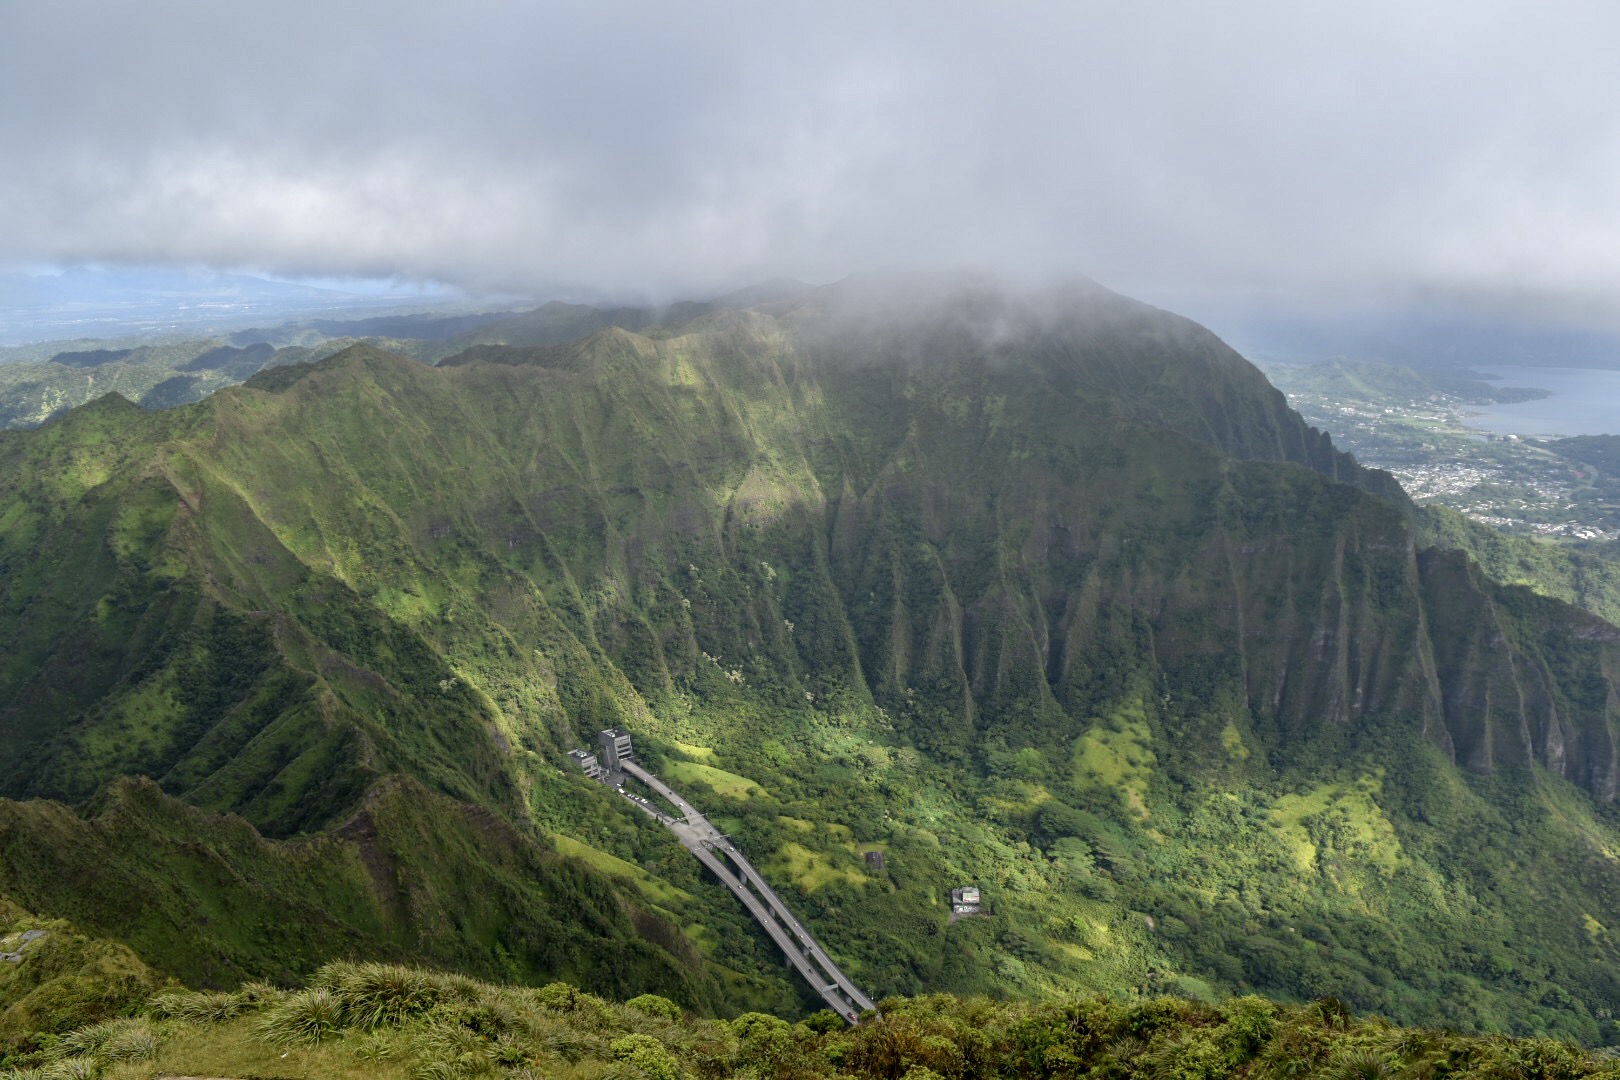
Views of the H-3 Highway from the top of the ridgeline
Once you get past the tree line, stop and turn around every so often to take in the views! The higher up you get, the more you can see from downtown Honolulu all the way to the airport and further up the coastline. The trail will continue to meander up and down the ridgeline with few obstructions from here. The views are absolutely breathtaking on a clear day and absolutely worth taking some extra time to soak in!
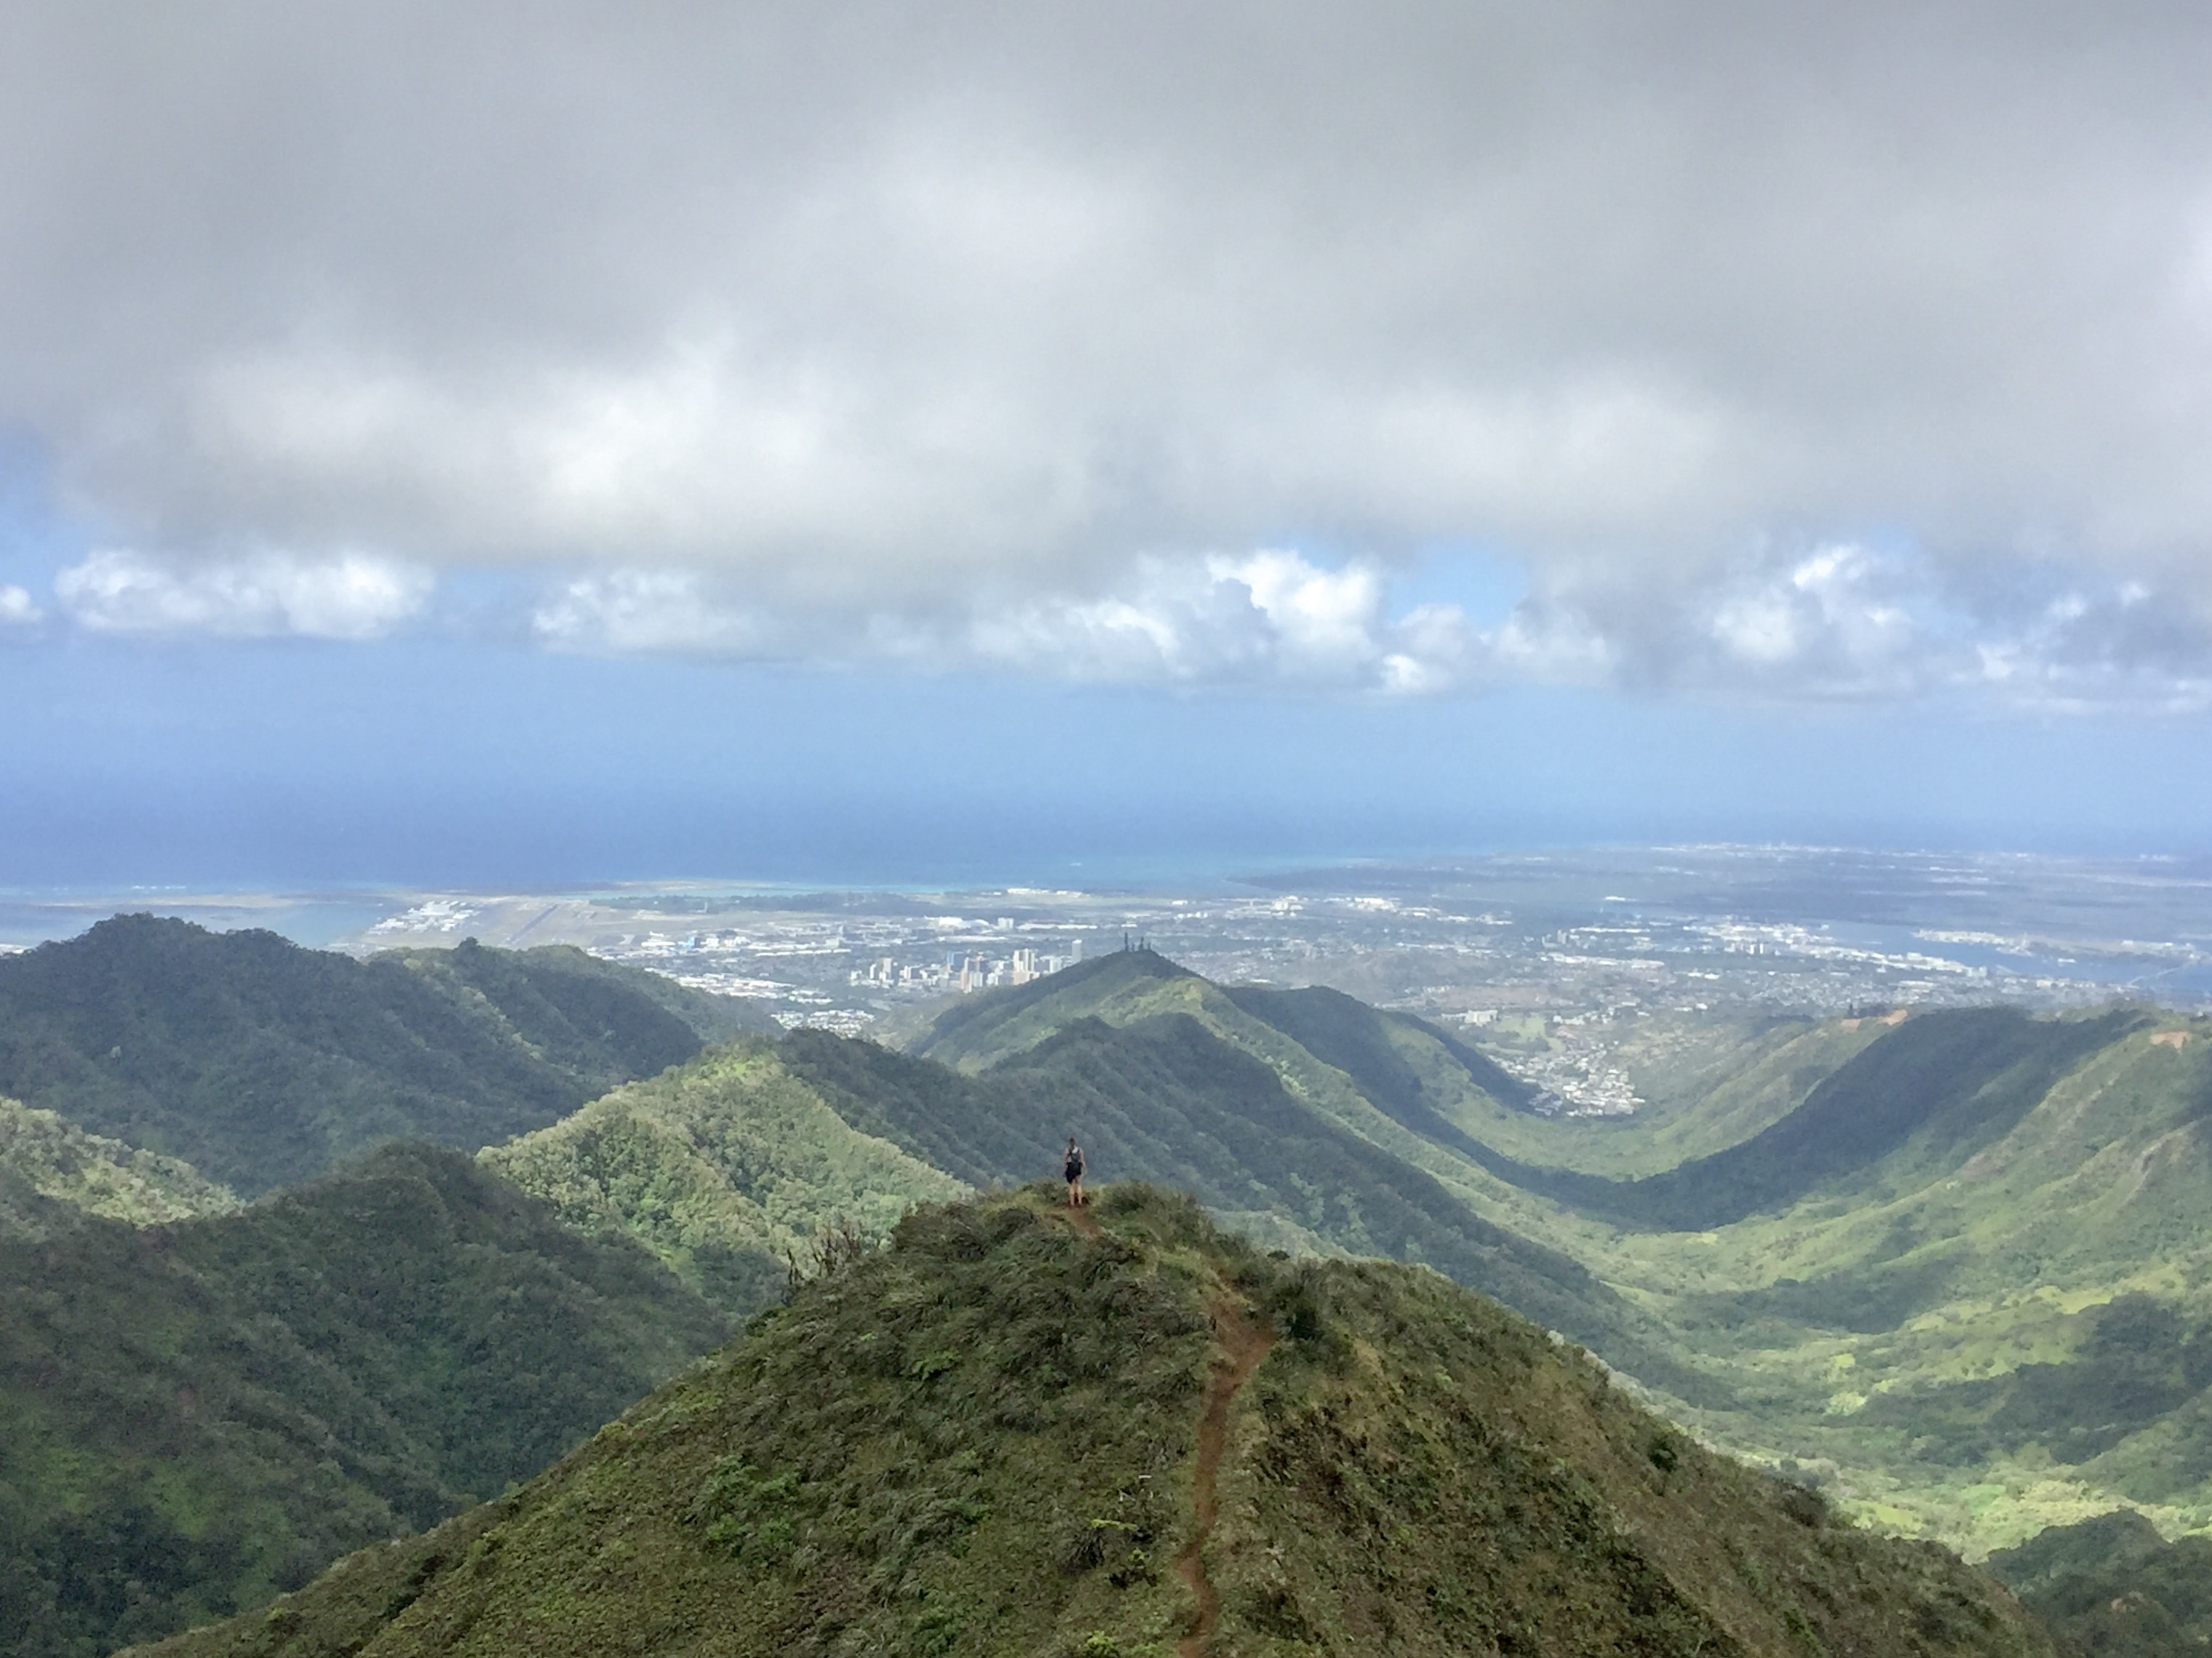
The backside view of Honolulu and the surrounding municipalities and ridge lines
Once you get within about a half-hour from the stairway, you will see the top of the radio tower platform come into view on your left-hand side. The trail will lead you towards it, so use it as an eye-sight guide if you get confused on where to go! It will lead directly up to a small metal staircase on the backside attached to the tower platform, which is the peak of the Haiku Stairs.
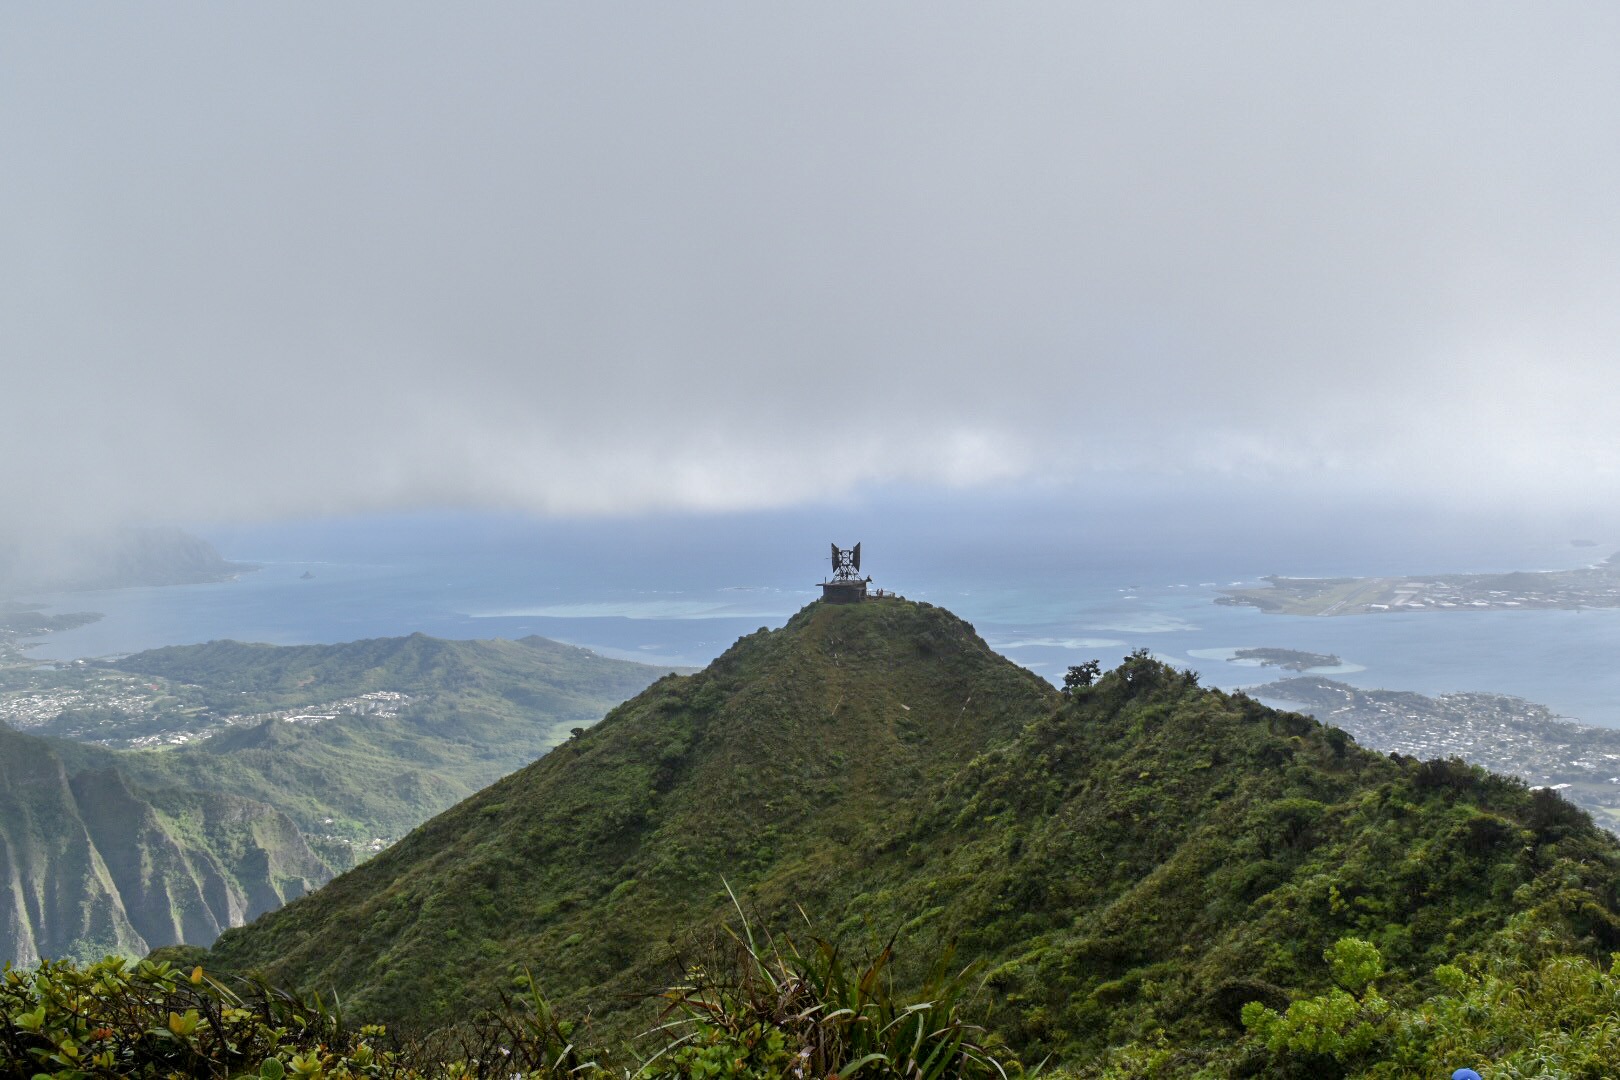
When you see this you are only about 20 – 30 minutes away!
The satellite tower itself is iconic and many people bring locks to attach to the lining inside. The tower is covered with beautiful graffiti art, and if you are daring enough to climb to the top, you can see almost a 360-degree view atop the ridges. This is the perfect place to rest up and eat lunch while making new friends with other hikers. Make sure to pack out your trash and bring extra space to pick up any spare litter to keep the environment as clean and natural as possible!

Gracefully eating lunch and seeking shelter from the wind in the satellite tower
If you have enough energy, you can explore the staircase from here and head down to other smaller tower houses and platforms for different views. Just make sure you save enough strength for the steep hike back up and the slippery hike down the trail! Going back is just as difficult if not a bit more tiring than climbing up, but still stunning and a great way to spend an afternoon!
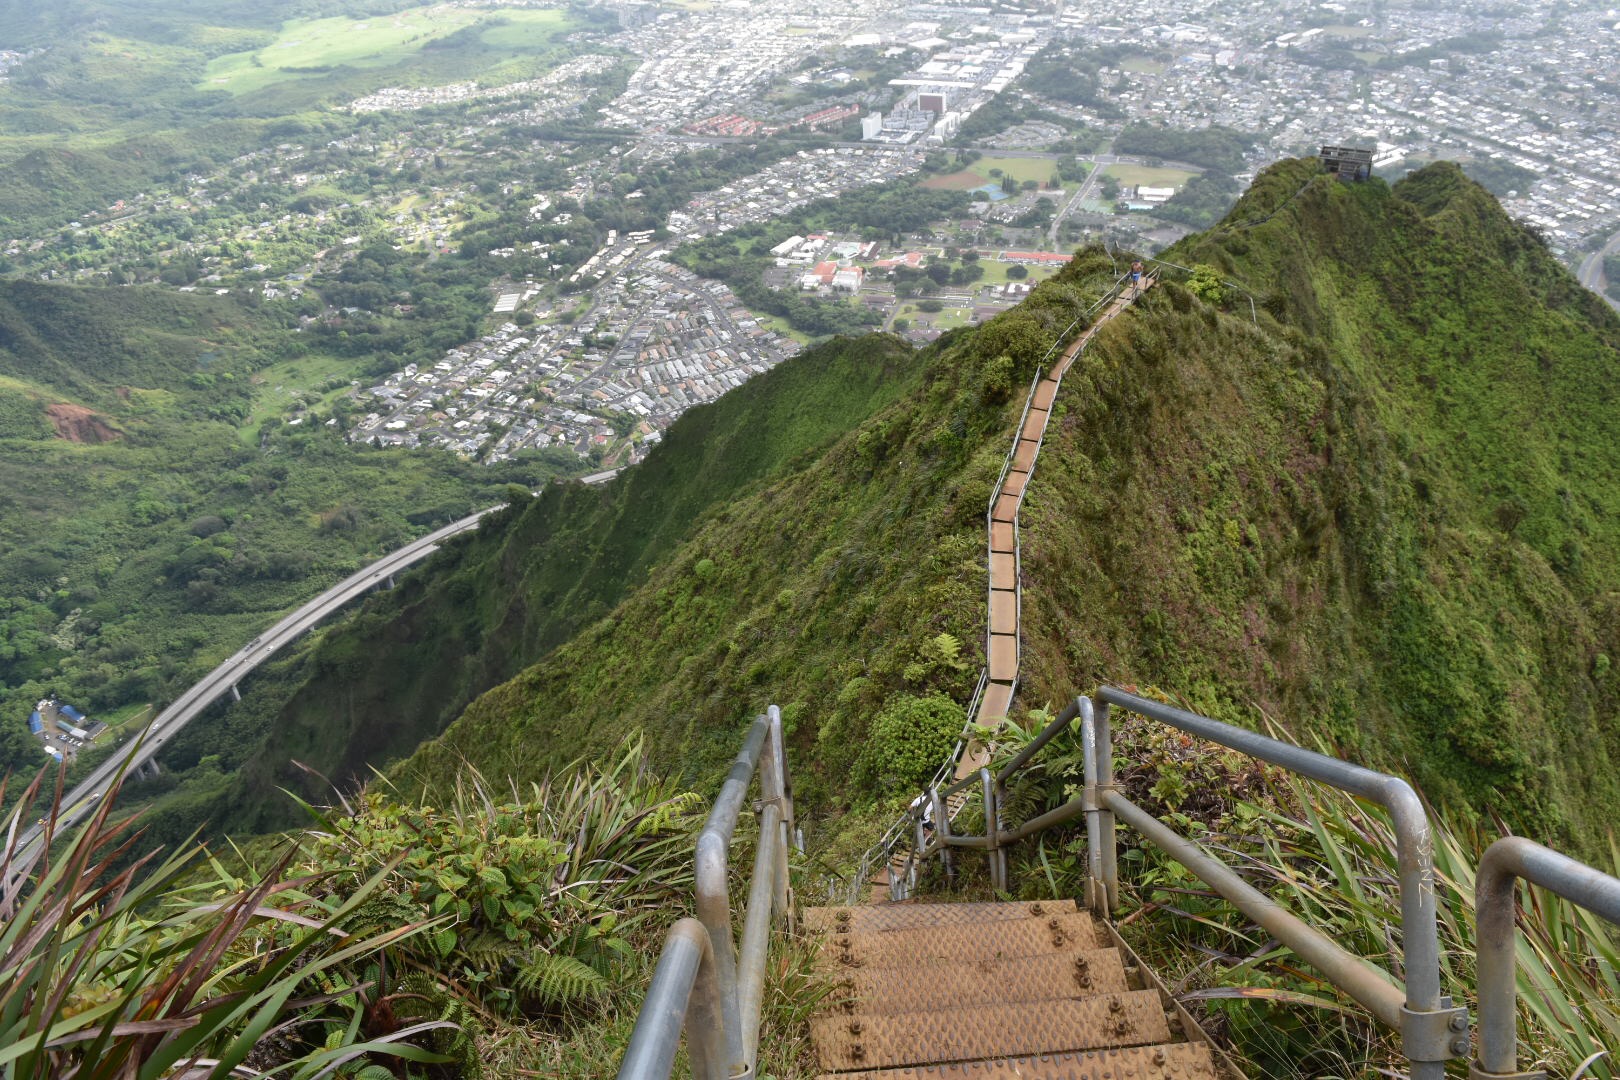
If you make it to the top, Congratulations! It is no easy feat. to get up here no matter which way you decide to go. Once you reach the bottom, the sense of accomplishment is well worth the effort to get there and you will leave with memories and photographs you can cherish for a lifetime!

Do you have any tips or questions about hiking to the Stairway to Heaven in Oahu? Share them in the comment section below!
